


")
")


 1000 seeds")
 1000 seeds")
 5000 seeds")
 5000 seeds")
 5000 seeds")
SEED STRATIFICATION
Seed stratification is a time for moist seeds to sit preparing to germinate. Many seeds require a cold stratification period in order to germinate while some require a warm stratification prior to the cold stratification.
Cold stratification is at the temperature of +1 - +6 Degrees C (34-41 Degrees F), while warm stratification is at the temperature of +20-30 degrees C (68-86 degrees F).
When a seed requires both a warm and cold stratification, the warm stratification is done first, followed by the cold stratification. A warm stratification is done to soften the seed coat or allow the seed embryo to mature. Only the mature seed embryo is capable of the cold stratification process.
Seed must be moist to stratify. Most seeds are dried to below 10% moisture for best storage. Seed below 10% moisture does not stratify very much and will just sit dormant (this is good for storage prior to stratifying or sowing). The moisture level must be increased to 60% + to allow the seed to begin to stratify. Mother Nature will naturally cold stratify the seed over the winter for seeds planted outside in colder areas.
When required, seed may also be artificially stratified to facilitate sowing in the spring or sowing in a greenhouse environment. This also allows sowing the seed in areas that do not have a long-or cold-enough winter. You do not stratify seed that is being fall sown outside in colder areas if the winter is long enough to give the required pre-treatment after sowing.
The seed requires the recommended treatment only once. As an example, do not cold stratify a seed and then fall sow. This is a double cold stratification. Once the initial stratification is complete the seed is ready to germinate. Should there be a fall warm up, the seed will begin the process of germination and will be killed by the freezing temperatures of winter. In addition, once the seed has completed stratification, it is ready to start growing. In this state the seed will use up its energy reserves at a rapid rate and will have a much reduced shelf life at warmer or cooler temperatures.
Seed that requires a stratification period of 30 days or less can be naked stratified without a moisture medium, while seed that requires 30 days or more stratification should be stratified with a moisture medium. (See the following for a discussion of the term of the moisture medium.) The seed does not know if it is inside a plastic bag or sown outside. All the seed can do is react to the warm or cold moist stratification in any environment.
PROCEDURE OF SPRINT SOWING OUTSIDE OR GREENHOUSE ENVIROMENT SOWING
Cold Stratification: +1-+6 Degrees C (34-41 Degrees F). Warm Stratification: +20-30 degrees C (68-86 Degrees F).
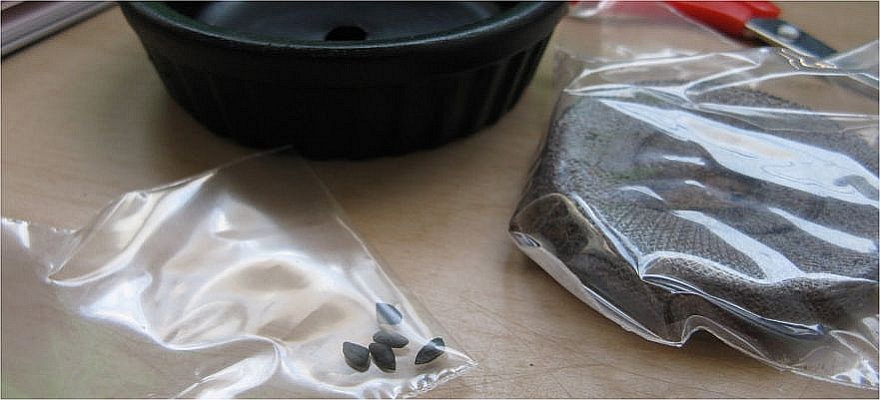
Seed should be stored cold prior to sowing or stratifying. Allow the seed to warm to room temperature, then soak in water 24 hours (for most species). Drain and place in a plastic bag with 3-4 times the volume of seed, moistened milled sphagnum moss, moistened Vermiculite or other suitable moisture medium. To moisten, place the moisture medium in a bag and add water. After the moisture medium has soaked up the water, hold the bag upside down and squeeze like a sponge to remove any excess water. Vermiculite soaks up water fast while moss may take 8-10 hours before it has fully hydrated. The moist moss or vermiculite is known as the moisture medium. Milled sphagnum moss should be used for any warm stratification as it has anti-fungicidal properties. Wear gloves when handling milled sphagnum moss. The moisture medium should always be a sterilized material so you do not introduce any mold or fungi into the treatment.
Shake up (seed/moisture medium mix) and place the bag in the refrigerator at +1-+6 Degrees C (34-41 Degrees F). Just put the bag of seeds to be stratified in the vegetable keeper or crisper of our refrigerator. Remember, the seed does not know where it is, only the temperature, so perhaps an unheated barn or garage is better for you. Whatever meets the temperature requirements of +1-+6 Degrees C (34-41 Degrees F). Above freezing is what you want, do not put the seed in a freezer or in a place where the seed will be frozen all winter. In nature, snow and duff on the forest floor form an insulation blanket that keeps the seed at a temperature just around freezing on most days.
The warm stratification process follows the same rules but the temperature at which stratification takes place is +20-30 degrees C (68-86 Degrees F). You should use milled sphagnum moss as the moisture medium when warm stratifying. Milled sphagnum moss has anti-fungicidal properties and will help control mold and fungi problems. Wear gloves when working with milled sphagnum moss.
Write the name of the seed, the date stratification started, and the date the seed should be removed from the refrigerator on the bag or on a tag attached to the bag. Check the next day and pour out any standing water.
Check every 2 weeks to look for molding or drying out. If a seed molds, just remove the seed and throw it away. If the mix starts to dry, add enough water to moisten, squeeze out any unused moisture, and re-seal the bag. Re-check again in one day for standing water.
After the required time period (or after 20% germination is noticed), remove the seed and sow in the greenhouse or outside in the spring.
You may slightly surface dry the seed to increase the ease of sowing. The wet seed tends to clump and stick. After planting, immediately water in the seed to facilitate good seed to soil contact, and keep the seed properly moistened.
Once stratification is started, a time clock begins ticking in the seed and the shelf life begins to decrease. Seed should not stay in stratification many months past its recommended stratification time as it will use up its energy reserves and die.
Stratification recommendations are an estimate only, and the actual requirements will vary from seed lot to seed lot and crop year to crop year. As with everything in life, a little common sense properly applied at the correct time keep things running smoothly.
SOW UNDER GLASS
Sow under glass is an older term and does not specifically mean that you need to use glass. It is a concept to be applied to your specific sowing environment, whether in a greenhouse, window sill, or in a seed bed environment.
Take a flat and fill it 3/4 full with moistened sterilized seedling starter mix. Use a sterilized seedling starter mix in the greenhouse or when sowing a single flat. Sow the seed on the surface in an even manner. Try not to clump the seed in lines or certain spots. Do not sow too dense. It is better to sow the seed a little too thin than too thick. Place the flat inside a clear plastic bag and seal it with a twist tie.
Place the flat in a sunny room where the temperature during the day goes up to at least 68 degrees Fahrenheit, with a temperature drop in the evening hours. Do not place in direct sunlight. Do not over water the flat. Watch for a color change in the soil which shows a moisture change. Usually the soil will lighten in color when it is drying. Water the flat by pouring water into the bottom of the opened bag. Do not water directly onto the soil in the flat. The water will collect in the bottom of the bag and then be drawn up through the bottom of the flat. Pour out any water not drawn up after one hour. Most seed that is sown under glass is very small in size and the subsequent seedlings are very small. If you water from the top you may damage the seedlings or move the seed around to form clumps. Seed sown under glass usually germinates in 2-4 weeks.
The humidity inside the mini-greenhouse you have created is much higher than the humidity outside of the bag. After germination and prior to removing the flat from the bag, you must slowly acclimate the seedlings inside the bag to the low humidity of the air outside of the bag. To do this, you can gradually open the bag wider and wider over a 2-3 week period prior to removal. Another method is to poke holes in the bags. Start with a few holes, then every 3-4 days add some more holes to the bag. The idea, no matter what your method is, is to slowly acclimate the seedlings to the lower air humidity outside of the bag over a 2-3 week period. Remember that once you start the acclimation of the seedlings you will have to increase the frequency of watering as the flats will dry out more quickly.
From the day of sowing until the seedlings are fully acclimated and removed from the plastic bag you must watch for mold and fungi problems. The best control measure is prevention by using only a sterilized seedling starter mix and properly watering. Fungi problems can be slowed by removing the affected area or perhaps using an approved fungicide as labeled. Keep a watch for fungi and mold problems.
The sowing under glass concept has been discussed here. Take the concept and apply it to your specific environment and cultural practices. Use common sense and apply.
HOT WATER TREATMENT
Seed that has a hard seed coat-induced dormancy requires a scarification to break down the seed coat so that the seed may germinate or begin its stratification process. A hard seed coat induced dormancy means the seed coat is too hard to allow water to enter. By stopping the entry of water, the seed coat stops the seed from germinating or being able to start any required moist stratification period.
One method to scarify many seeds is the hot water treatment, which is as follows: Pour (4 times the volume of seed) almost boiling water over the seed and allow the seed to cool for 12-24 hours. Seed that is properly scarified will sink or swell depending on the type of seed. Robinia pseudoacacia will swell when scarified, while Acer palmatum will sink after proper hot water treatment scarification. The floating seed may be separated to repeat the process for those seeds (if any) which are not properly scarified yet. Seed not properly scarified may take several years to germinate in an outside seed bed. Non-scarified, hard seed coat seeds planted in a flat may never germinate at all or only at very low percentages.
Be careful with any hot water you handle. Use only disposable containers and not something you eat or drink out of. Do not use boiling water.
As always use the proper combination of common sense and care when working with seed or seed treatments.